 English
- English
-
 Español
 -
 Português
 -
 русский
 -
 Français
 -
 日本語
日本語 -
 Deutsch
 -
 tiếng Việt
 -
 Italiano
 -
 Nederlands
 -
 ภาษาไทย
 -
 Polski
 -
 한국어
한국어 -
 Svenska
 -
 magyar
 -
 Malay
Malay -
 বাংলা ভাষার
 -
 Dansk
Dansk -
 Suomi
Suomi -
 हिन्दी
 -
 Pilipino
 -
 Türkçe
 -
 Gaeilge
 -
 العربية
 -
 Indonesia
 -
 Norsk
Norsk -
 تمل
تمل -
 český
český -
 ελληνικά
 -
 український
 -
 Javanese
 -
 فارسی
فارسی -
 தமிழ்
தமிழ் -
 తెలుగు
 -
 नेपाली
 -
 Burmese
 -
 български
 -
 ລາວ
ລາວ -
 Latine
 -
 Қазақша
 -
 Euskal
 -
 Azərbaycan
 -
 Slovenský jazyk
 -
 Македонски
 -
 Lietuvos
 -
 Eesti Keel
 -
 Română
 -
 Slovenski
 -
 मराठी
मराठी -
 Srpski језик


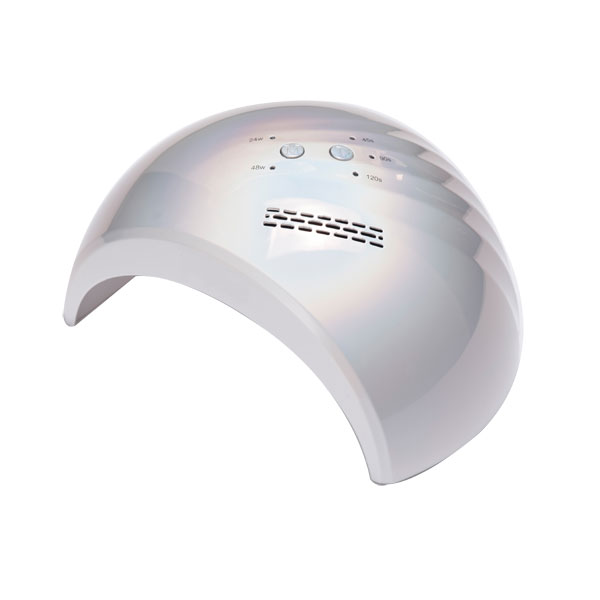
How to bake nails
1. Gel-reinforced natural nail procedure (natural nail has been repaired in shape):
(1) Engraving (note that the trailing edge and nail groove are in place);
(2) Special effect cleaning fluid to scrub the nail surface;
(3) Apply a thin layer of adhesive and bake for 30 seconds;
(4) Apply transparent (pink) gel (be careful not to flow into the back edge and nail groove) and bake for 2 minutes (wrap the front edge with gel);
(5) Apply the sealant, not too thin, and bake for 2 and a half minutes;
(6) Cleaning with cleaning fluid;
(7) Apply nutrient oil;
2. Patch Gel A:
(1) Carving;
(2) On the patch, the surface of the patch needs to be carved and ground;
(3) Cleaning liquid to clean the nail surface;
(4) Apply adhesive for 30 seconds;
(5) Apply transparent (pink) gel for 2 minutes (wrap the front edge with gel), and polish the nail shape;
(6) Apply sealant and bake for 2 and a half minutes;
(7) Cleaning;
(8) Apply nutrient oil;
3. Color gel nail:
(1) Carving and grinding.
(2) The cleaning fluid cleans the nail surface.
(3) Apply adhesive and bake for 30 seconds.
(4) Put on the paper support board, the front edge and the transparent gel for the connection, bake for 2 minutes and pinch the camber.
(5) Dip the color gel with shell powder and apply it to the front edge in a "Z" shape for 2 minutes.
(6) Apply Jingjingliang gel to nails and bake for 2 minutes.
(7) Polishing, shaping, and cleaning the nail surface.
(8) Apply sealant, light therapy for 2 and a half minutes, and wrap the front edge.
(9) Apply nutrient oil, if you need to paint or engrave, proceed at the end of step 7.
4. French gel nail:
(1) Disinfection;
(2) Remove nail polish;
(3) Grinding and dust removal;
(4) Clean the nail surface with a special-effect cleaning fluid, until it is naturally dry and dust-free;
(5) Install the paper pallet;
(6) Apply a small amount of adhesive on the nail surface from the root to the edge of the nail to form a thin layer. The phototherapy is half a minute, and the phototherapy can be used for the other hand at the same time. (Too much adhesive is easy to fall off, 4 fingers can be used at the same time, and it cannot be cleaned after phototherapy);
(7) To make the front edge, use a phototherapy pen to take a small amount of white or colored extension gel from the outside of the nail to the left side of the nail. The extension gel for this part should not be too thick. Use professional tweezers to make the curvature of the smile line, skimming out the excess gel, light therapy for 2 minutes, and you can’t clean it after light therapy.
(8) Apply the pink extension gel to the nail, dip the phototherapy pen into the pink extension gel and take it out, pull out a trace of gel to the nail surface that needs to be filled, and let it flow on the nail surface and then flatten to form a smooth plane . Repeat this process on the other nails, wipe off the surrounding skin and root gel with a plastic push to avoid peeling off, light therapy for 2 minutes;
(9) Use a special-effect cleaning solution to remove residual stickies, remove the paper tray, turn the customer's hand over, and treat the back of the nail for 1 minute.
(10) Clean the nails and file out the ideal lines with a white file to remove dust;
(11) Apply a thin layer of super-effect sealant on the nail surface to avoid contact with the skin, and phototherapy for 2 and a half minutes.
(12) Clean up the residue again with special effect cleaning fluid.
(13) Apply nutrient oil and massage the roots to make the nail surface smooth and flawless.
Send Inquiry


X
We use cookies to offer you a better browsing experience, analyze site traffic and personalize content. By using this site, you agree to our use of cookies.
Privacy Policy